The Banshee is a fun rocket with whistles for fin pods! For a preview of the rocket and how it’s made, I’ve set a time lapse to music. Don’t forget to like and subscribe!
Your home for High Performance Rocketry
The Banshee is a fun rocket with whistles for fin pods! For a preview of the rocket and how it’s made, I’ve set a time lapse to music. Don’t forget to like and subscribe!
Creating nose cones in a CAD package can be challenging by hand, but easy when it’s done through software. In Part 1 of this 2 part series, I show you how to install an add in for Fusion 360 that does the work for you. Don’t forget to like and subscribe!
Get the macro: https://www.davesrocketshop.com/?page_id=67
I’ve had a macro for FreeCAD for a couple of years that simplifies creating nose cones using parameters entered in a dialog. For many hobbyists, Fusion 360 is a more popular platform. Here then is a port of the program designed to run as an add-in to Fusion 360.
It’s easiest to explain installation and use in a video so check it out here:
Part 1 – Installation and Options: https://youtu.be/6wYUXH9TK1g
Part 2 – An example: https://youtu.be/jBtWD9JqQ6Q
Also, Wikipedia has a great entry on nose cone design. https://en.wikipedia.org/wiki/Nose_cone_design
Try it out and let me know how it works for you!
Released under the MIT license.
It’s been a busy time with the 3D printer. In addition to some heavy duty runs printing Saturn V parts, I’ve solved issues on 2 different fronts, resulting in not one but two different blog entries! Check them out here: https://www.davesrocketshop.com/?page_id=148
I’ve made no secret of my printers vibration problem. Subtle ghosting, not easy to track down. But I still want good detail prints, so drop the layer height to 0.1 mm at 10 mm/s.
At this speed, the extruder exhibits quantization. The plastic comes out in spurts and under extrudes. The bent string part in the image is the skirt and should be straight. Apparently you can print too slow! I increased the speed to 20 mm/s and the raft prints fine.
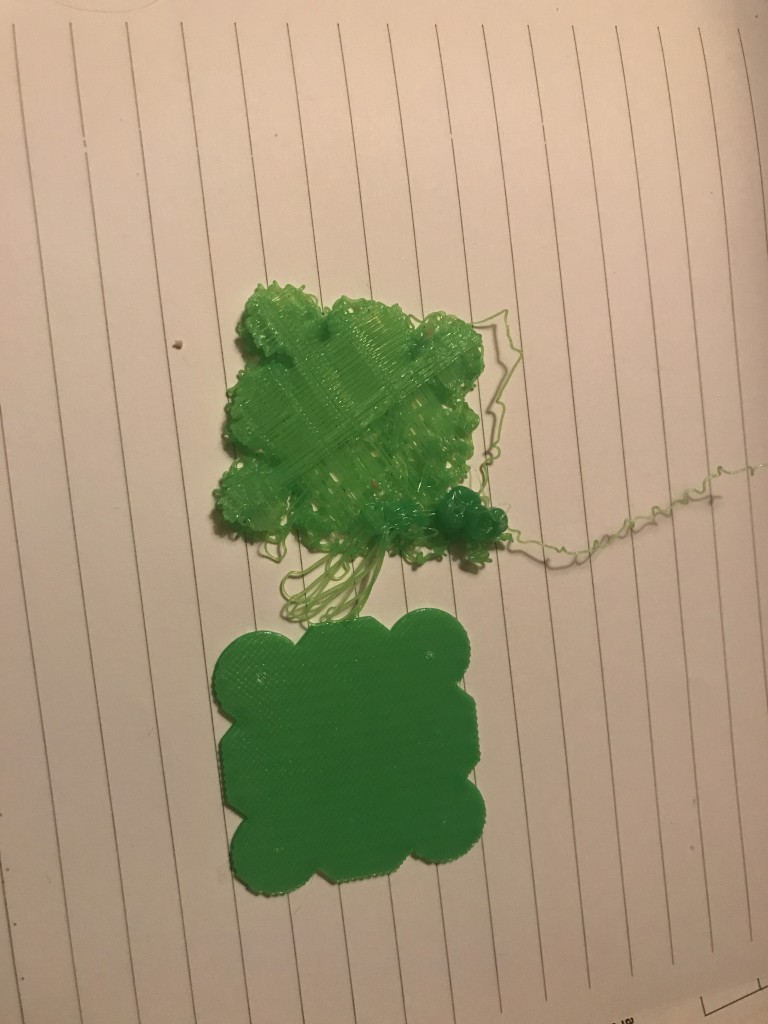
Underextrusion caused by extruder quantization
With that issue fixed I print my Saturn V LES tower. Ignore the colour. I’m using a plastic I have lots of for test prints.As I’m fond of saying, for every solution there is a problem, and in this case it’s a bad case of stringing! This is new! A string test confirms it’s probably something in my settings and not inherent in the model.
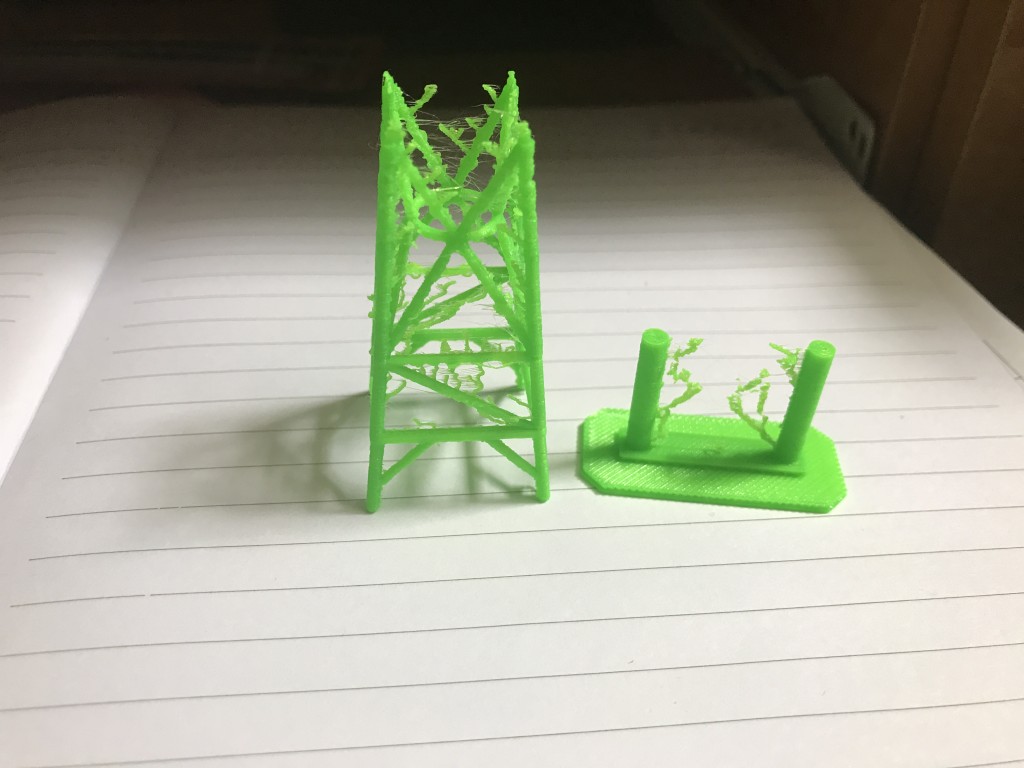
Stringing in the LES tower confirmed with a stringing test
There are many ways to fix stringing. One is to drop the print temperature. I dropped it from 210 down to 195, but with my extrusion heating issues I didn’t dare drop it any more. I increased extrusion distance to 2.5 with no noticeable impact. I increased the retraction speed from 30 to 50 mm/s with some improvement. Finally I retracted 3.5 mm at 80 mm/s. The final result is some small wisps but that’s okay.
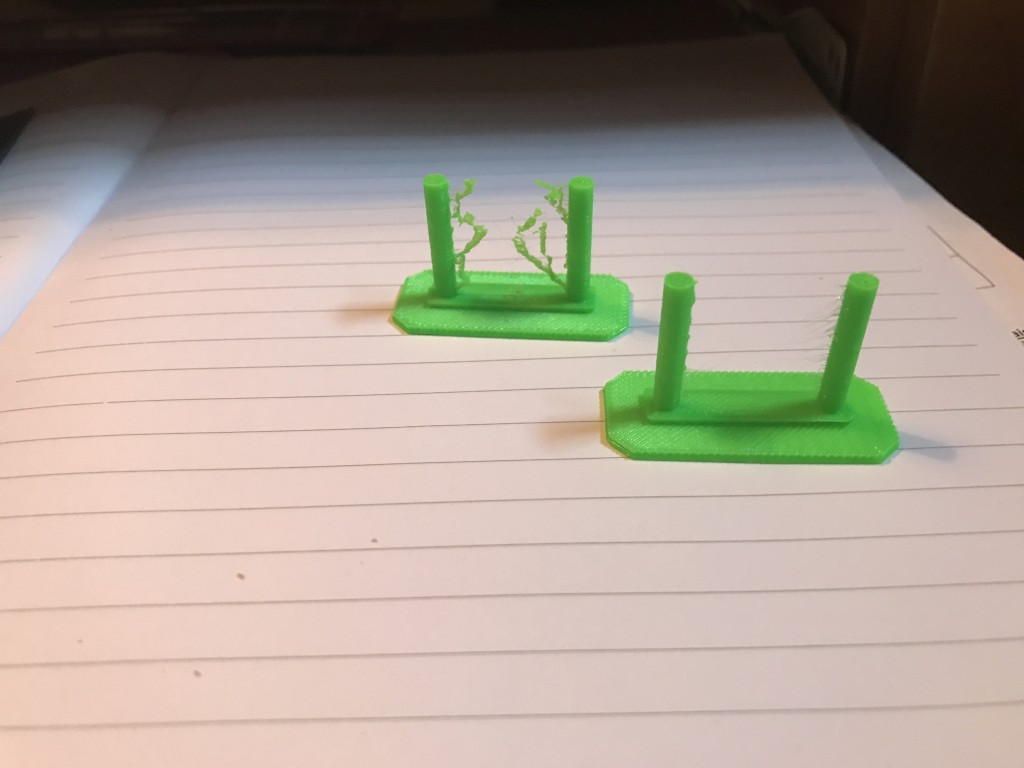
Stringing before and after adjustments
One variable I hadn’t addressed was the filament. This was a new brand for me, and although I’d done a couple of prints already, they weren’t models that would exhibit stringing. A test with my “standard” settings at 40 mm/s and 0.2 layer height show everything is fine. I’m still not sure if it’s the low speed or fine layer height (I suspect the latter), but that’s a topic for another day. For now I have settings that I can use to print, so I’m a happy maker!
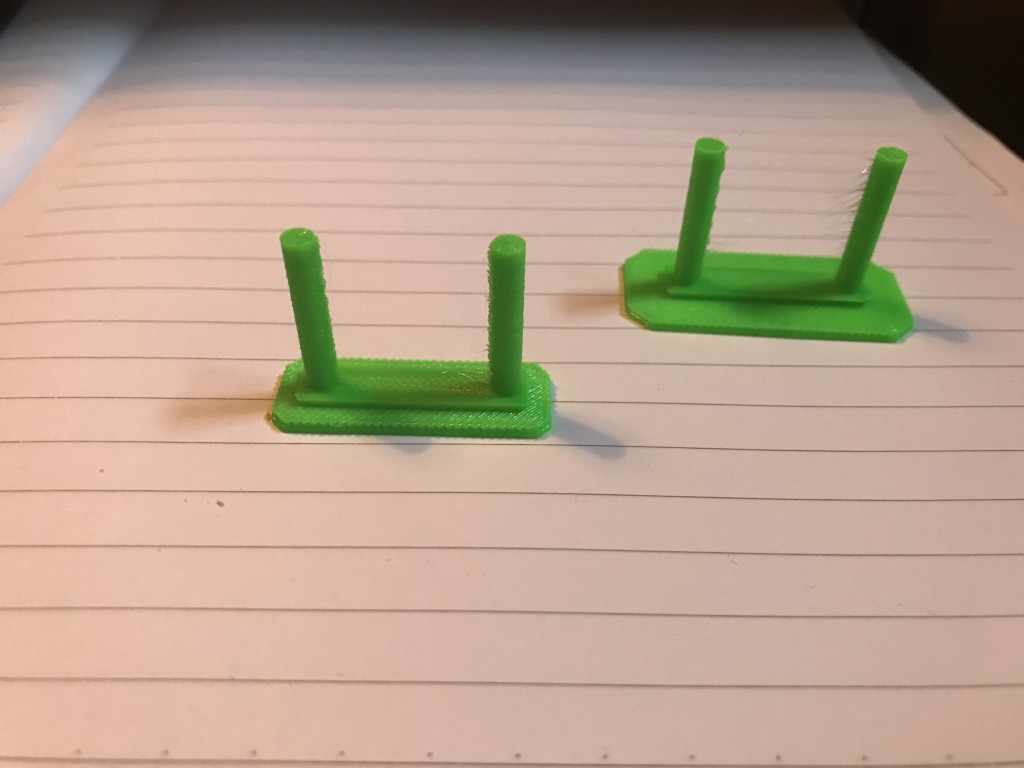
Adjusted high detail, low speed string test compared to my normal speed and detail
This does represent a full day of effort. Don’t listen when people say 3D printing is easy. It’s easy for the experts who know all this stuff already, but for n00bs there’s a big learning curve. When I first started this would have set me back weeks! Even now it’s lost time when all I want to do is get something printed.
A few months ago, I upgraded my printer with 2 cooling fans, one on either side of the extruder. Stock configuration had a single fan that got destroyed when an unobserved print went haywire and plastic went into the fan itself. The time was right to do the upgrade.
I can’t remember why, but I updated my firmware at the same time to Marlin 1.1.8, the latest release at the time. I’ve since updated to 1.1.9 but both had the same issues I’m about to talk about. That is thermal runaway protection. The reality is, I’d been affected by this since day one but hadn’t known. The stock fan configuration wasn’t particularly strong, and the software didn’t complain about it, but when my prints started, the fan started cooling the extruder. Close to the bed, at the start of the print, this was quite significant. So much so that the updated software complained that the heater wasn’t able to keep up once the fan turned on, and shut itself off. Every time.
The solution is to use a silicon sock to prevent this by insulating the heater block. I don’t have one. I’m still looking for one that fits.
The workaround is to scale the fans maximum speed back. Way back. It was worse with the new fan configuration, especially near the bed where the cooler air gets reflected back. Depending on the print it will also happen away from the bed. So I turned runaway detection off and babysat the fans so I could maximize print cooling without allowing the extruder temperatures to drop out of acceptable range. That’s a lot of time staring at temperature plots and entering GCode since OctoPrint has no fan control.
Enter Marlin 2.0. It’s not a release version yet although it has experienced significant development already. It will eventually include 32 bit support for a number of boards. But for me the key feature is it automatically scales back the fan speed as the extruder temperature drops. No more babysitting my prints!
How well does it work? Well, the two prints here are printed with 1.1.9 and babysitting in white, and 2.0 with automatic control in green. So yeah, I think I’m happy!
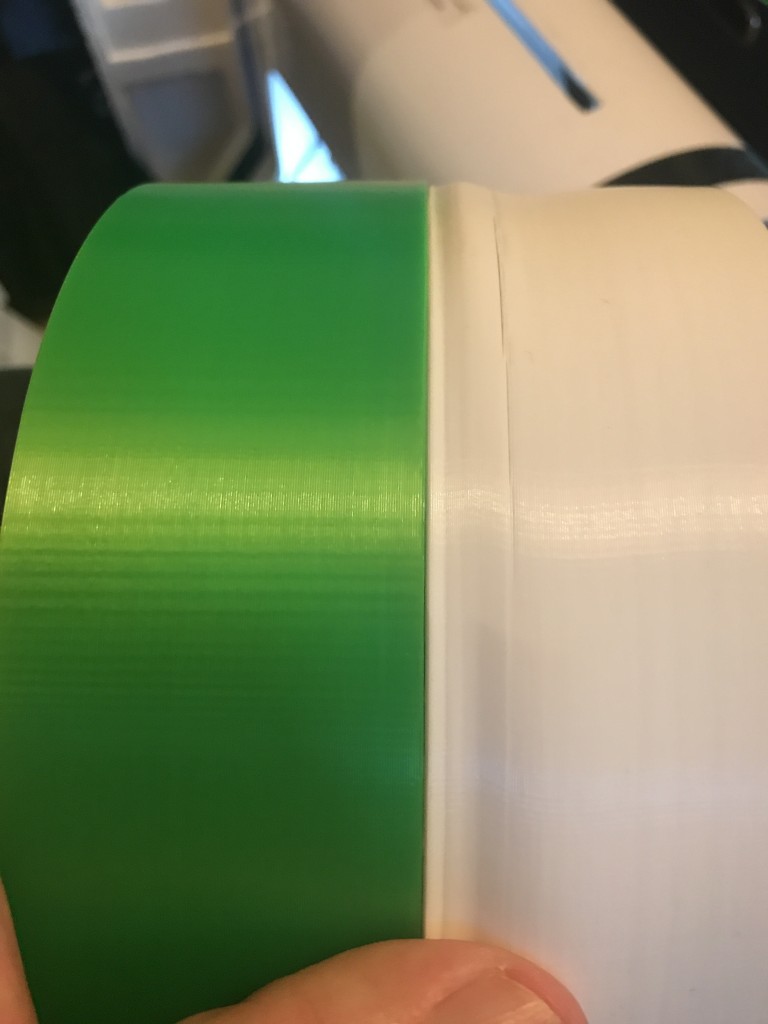
Automatic fan speed control in green, manual control in white
The stack is progressing! In this issue I talk about the S-IVB stage and its transition to the lower airframe. More importantly I talk about an issue with the scale for the flyable version. Don’t forget to like and subscribe!
Below the CSM comes the SLA (Service Module to Lunar Module Adapter). In this video I discuss some basic printing tricks that can significantly reduce the amount of plastic used and time required to print. Don’t forget to like and subscribe!
With the models released for the LES and CSM assembly can now begin. It’s a simple piece but there are some minor points to making an accurate model.
In anticipation of the 50th anniversary of Apollo 11 I’m beginning a mostly 3D printed build of the Saturn V. In this episode I describe the plans for the build.