3D Printing Blog
3D Printer Update
If you’ve been following me for any length of time, you’ll know I’m not happy with my current 3D printer, a Robo 3D R1+. When I first got it, it was probably the best value for the money, and was giving great prints. But, being the mechanical beasts that they are, that didn’t last.
I had many problems early due to my not having any experience. In particular, I had no idea about Z offsets and the effects it would have. Out of the box it worked fine, but I struggled with jams. The primary cause was the nozzle being too close to the bed, and as a result it kept scraping the glue I used to help prints stick to the bed resulting in not just a jam but a clog. I knew no one else with a 3D printer so I had no one to turn to for advice. The forums were good, but slow. I was working on a project at the time that needed to progress so the result was me walking away from the printer for months at a time.
Eventually I figured it out. Now I can deal with it in my sleep. Then the bed heater failed – upgrade number one. Then I got a vibration problem that I’ve never been able to fix. I’ve tried replacing rods, bearings, slowing down, and any tips and tricks I’ve come across. I just can’t reliably print anything with fine detail, or even the Launch Escape System tower that is part of my Saturn IB and Saturn V rockets. This is even more distressing knowing that I was able to print prototype versions perfectly when the printer was new, a feat I now find impossible to duplicate.
I’ve finally bit the bullet and started working on a replacement. Enter the Hypercube Evolution (HEVO):
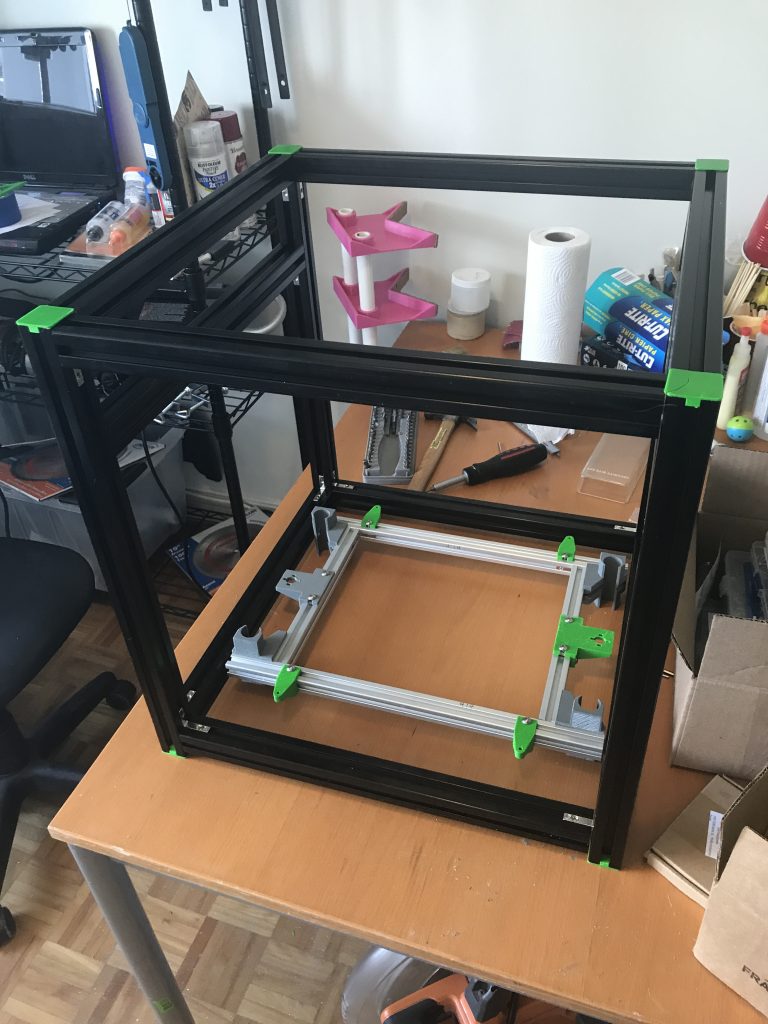
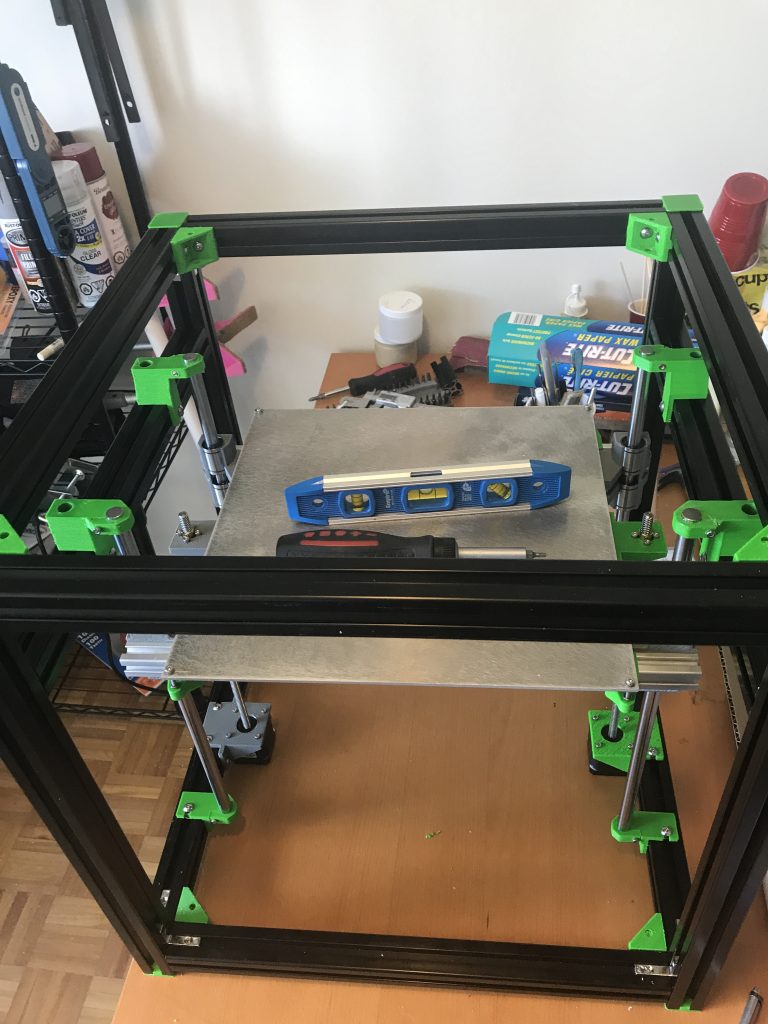
As you can see, the current printer is still adequate for printing larger parts such as the ones used by the HEVO. So far, I have the print bed mostly finished, but there’s a lot of work yet to do. This is a CoreXY style printer. The parts are printed but I’m awaiting delivery of the non-printed parts. I haven’t started on the electronics yet.
My plan had been to wait until the new printer is ready before doing any significant updates to the older printer. Unfortunately this was not to be. My thermistor failed. Facing the need to replace this, I instead decided to do an upgrade I’d planned a while ago. I have a brand new V6 hot end assembled and ready to install. It does require some physical mods for the printer which is why I’d been holding off.
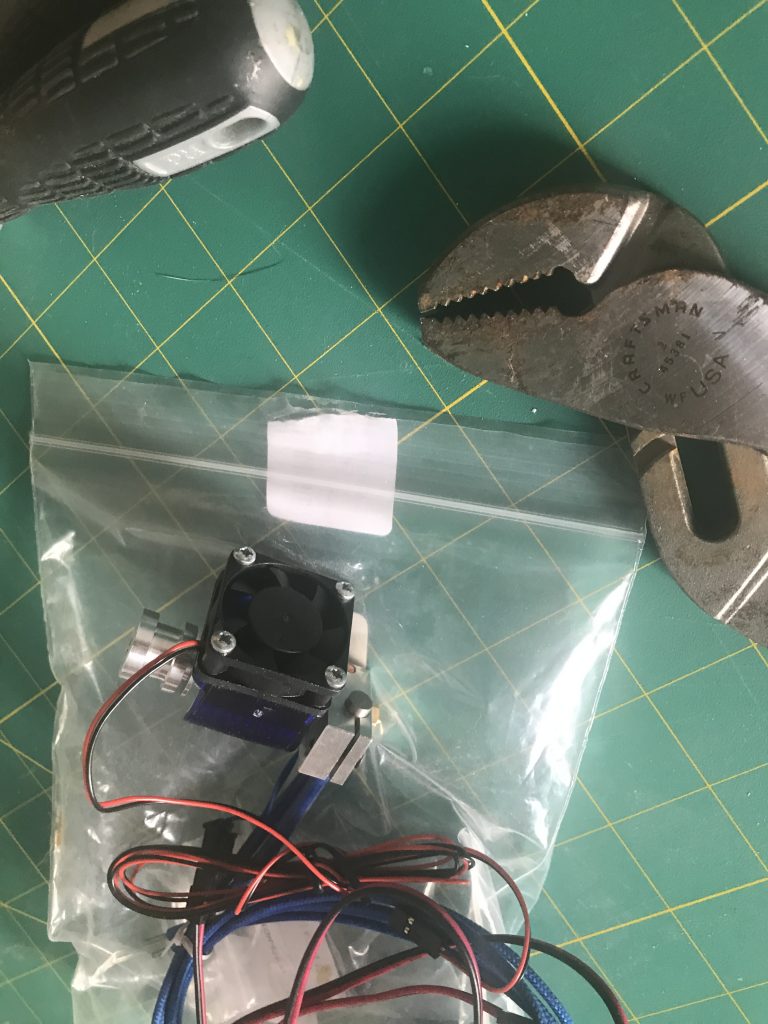
That is my weekend project. This may fix some other issues as well, as I know there’s an intermittent connection on the current hot end heat sink fan that wasn’t worth repairing. The printer will still be usable either way, and when I’m done with the new one my brother will be receiving a less than perfect but useful tool.
Nose Cones in Fusion 360
Creating nose cones in a CAD package can be challenging by hand, but easy when it’s done through software. In Part 1 of this 2 part series, I show you how to install an add in for Fusion 360 that does the work for you. Don’t forget to like and subscribe!
Get the macro: https://www.davesrocketshop.com/?page_id=67
Fusion 360 Add In for creating Nose Cones
I’ve had a macro for FreeCAD for a couple of years that simplifies creating nose cones using parameters entered in a dialog. For many hobbyists, Fusion 360 is a more popular platform. Here then is a port of the program designed to run as an add-in to Fusion 360.
It’s easiest to explain installation and use in a video so check it out here:
Part 1 – Installation and Options: https://youtu.be/6wYUXH9TK1g
Part 2 – An example: https://youtu.be/jBtWD9JqQ6Q
Also, Wikipedia has a great entry on nose cone design. https://en.wikipedia.org/wiki/Nose_cone_design
Try it out and let me know how it works for you!
Released under the MIT license.
Adventures in low speed printing
I’ve made no secret of my printers vibration problem. Subtle ghosting, not easy to track down. But I still want good detail prints, so drop the layer height to 0.1 mm at 10 mm/s.
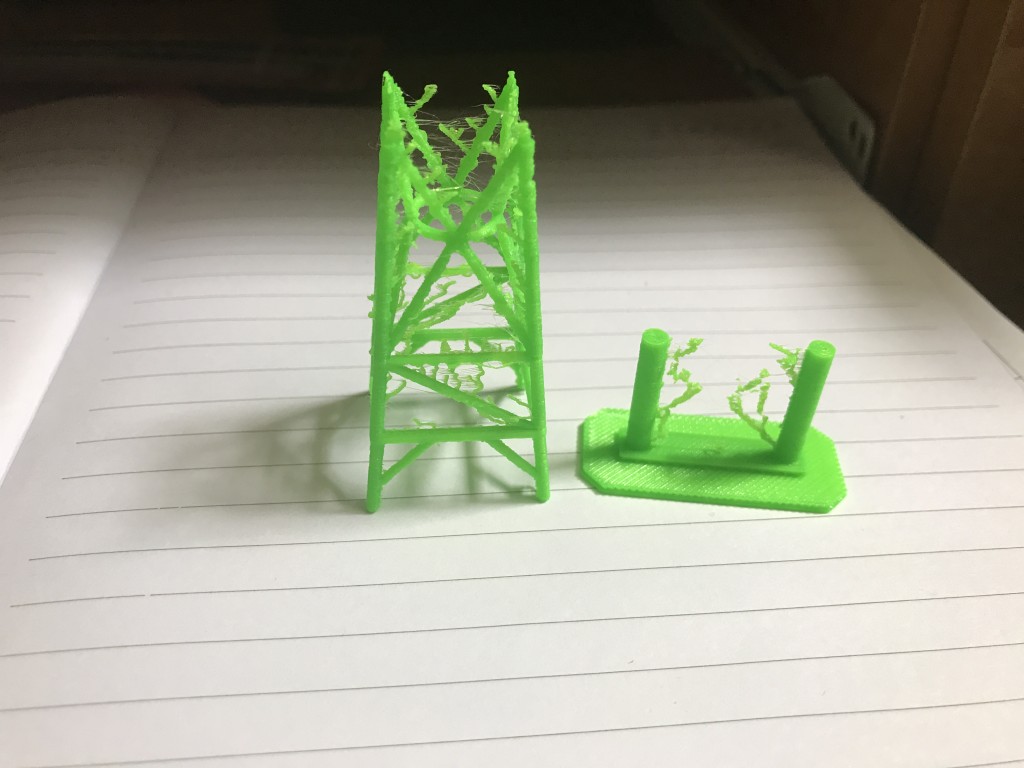
At this speed, the extruder exhibits quantization. The plastic comes out in spurts and under extrudes. The bent string part in the image is the skirt and should be straight. Apparently you can print too slow! I increased the speed to 20 mm/s and the raft prints fine.
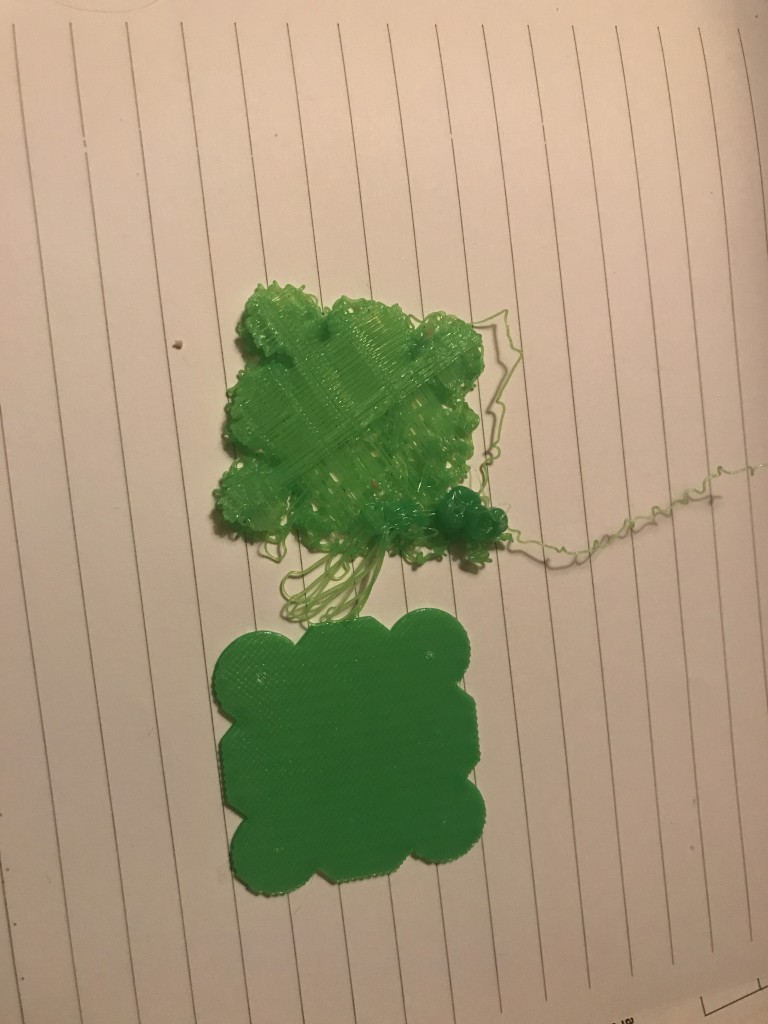
Underextrusion caused by extruder quantization
With that issue fixed I print my Saturn V LES tower. Ignore the colour. I’m using a plastic I have lots of for test prints.As I’m fond of saying, for every solution there is a problem, and in this case it’s a bad case of stringing! This is new! A string test confirms it’s probably something in my settings and not inherent in the model.
Stringing in the LES tower confirmed with a stringing test
There are many ways to fix stringing. One is to drop the print temperature. I dropped it from 210 down to 195, but with my extrusion heating issues I didn’t dare drop it any more. I increased extrusion distance to 2.5 with no noticeable impact. I increased the retraction speed from 30 to 50 mm/s with some improvement. Finally I retracted 3.5 mm at 80 mm/s. The final result is some small wisps but that’s okay.
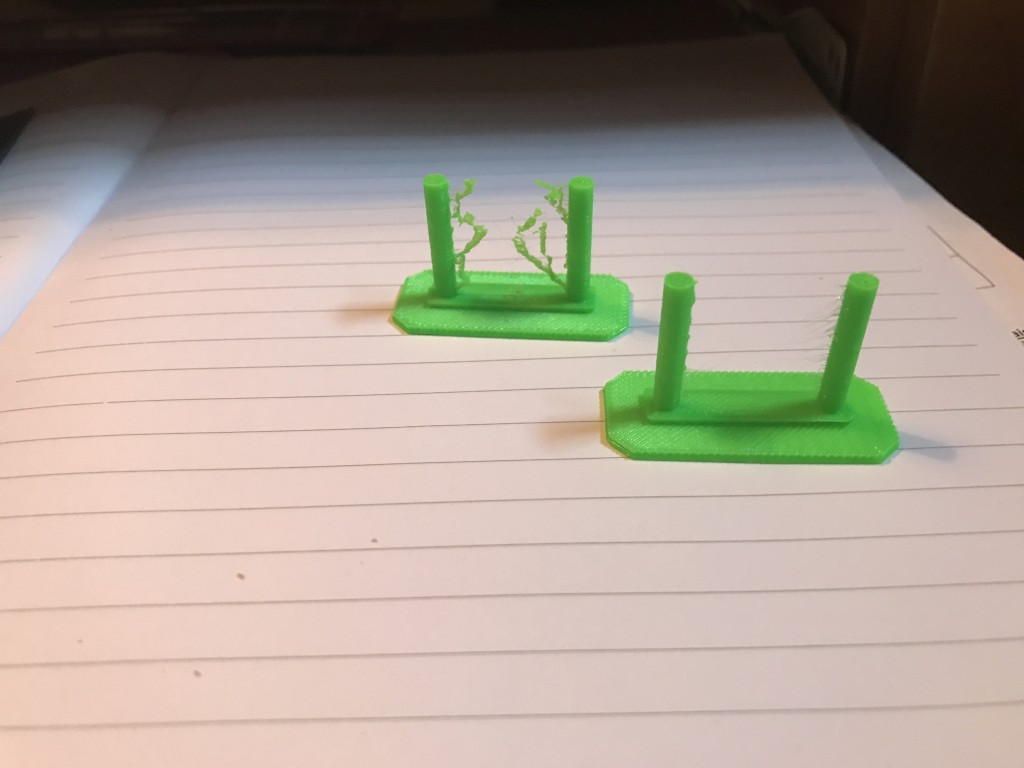
Stringing before and after adjustments
One variable I hadn’t addressed was the filament. This was a new brand for me, and although I’d done a couple of prints already, they weren’t models that would exhibit stringing. A test with my “standard” settings at 40 mm/s and 0.2 layer height show everything is fine. I’m still not sure if it’s the low speed or fine layer height (I suspect the latter), but that’s a topic for another day. For now I have settings that I can use to print, so I’m a happy maker!
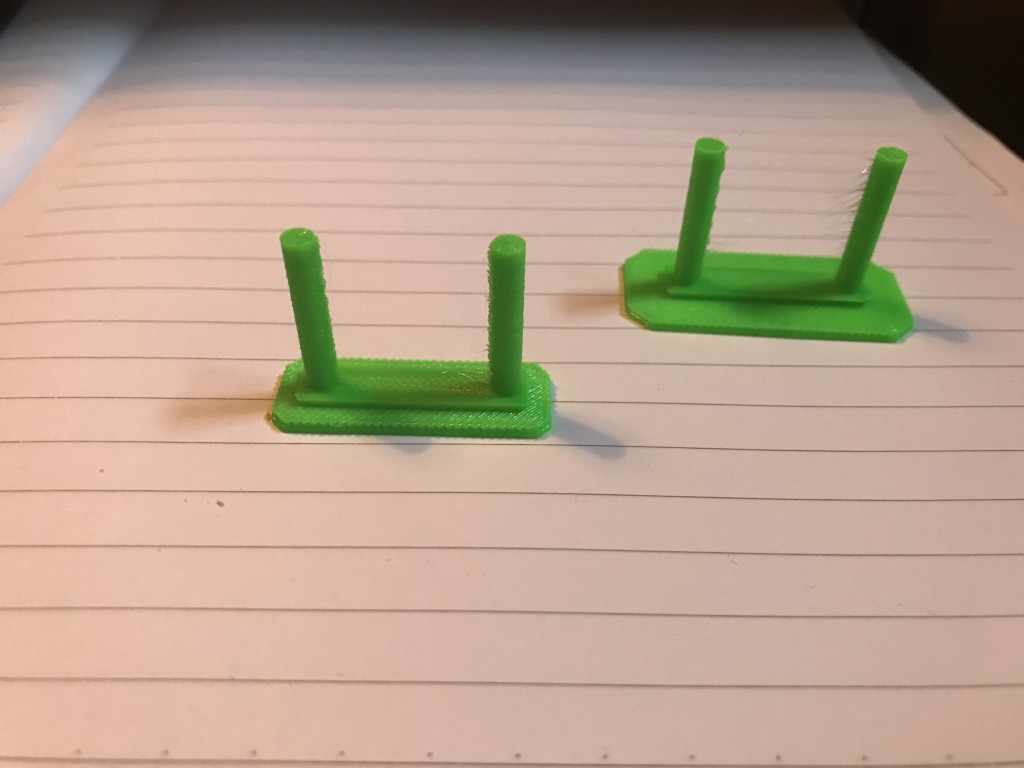
Adjusted high detail, low speed string test compared to my normal speed and detail
This does represent a full day of effort. Don’t listen when people say 3D printing is easy. It’s easy for the experts who know all this stuff already, but for n00bs there’s a big learning curve. When I first started this would have set me back weeks! Even now it’s lost time when all I want to do is get something printed.
Marlin 2.0 Automatic fan control
A few months ago, I upgraded my printer with 2 cooling fans, one on either side of the extruder. Stock configuration had a single fan that got destroyed when an unobserved print went haywire and plastic went into the fan itself. The time was right to do the upgrade.
I can’t remember why, but I updated my firmware at the same time to Marlin 1.1.8, the latest release at the time. I’ve since updated to 1.1.9 but both had the same issues I’m about to talk about. That is thermal runaway protection. The reality is, I’d been affected by this since day one but hadn’t known. The stock fan configuration wasn’t particularly strong, and the software didn’t complain about it, but when my prints started, the fan started cooling the extruder. Close to the bed, at the start of the print, this was quite significant. So much so that the updated software complained that the heater wasn’t able to keep up once the fan turned on, and shut itself off. Every time.
The solution is to use a silicon sock to prevent this by insulating the heater block. I don’t have one. I’m still looking for one that fits.
The workaround is to scale the fans maximum speed back. Way back. It was worse with the new fan configuration, especially near the bed where the cooler air gets reflected back. Depending on the print it will also happen away from the bed. So I turned runaway detection off and babysat the fans so I could maximize print cooling without allowing the extruder temperatures to drop out of acceptable range. That’s a lot of time staring at temperature plots and entering GCode since OctoPrint has no fan control.
Enter Marlin 2.0. It’s not a release version yet although it has experienced significant development already. It will eventually include 32 bit support for a number of boards. But for me the key feature is it automatically scales back the fan speed as the extruder temperature drops. No more babysitting my prints!
How well does it work? Well, the two prints here are printed with 1.1.9 and babysitting in white, and 2.0 with automatic control in green. So yeah, I think I’m happy!
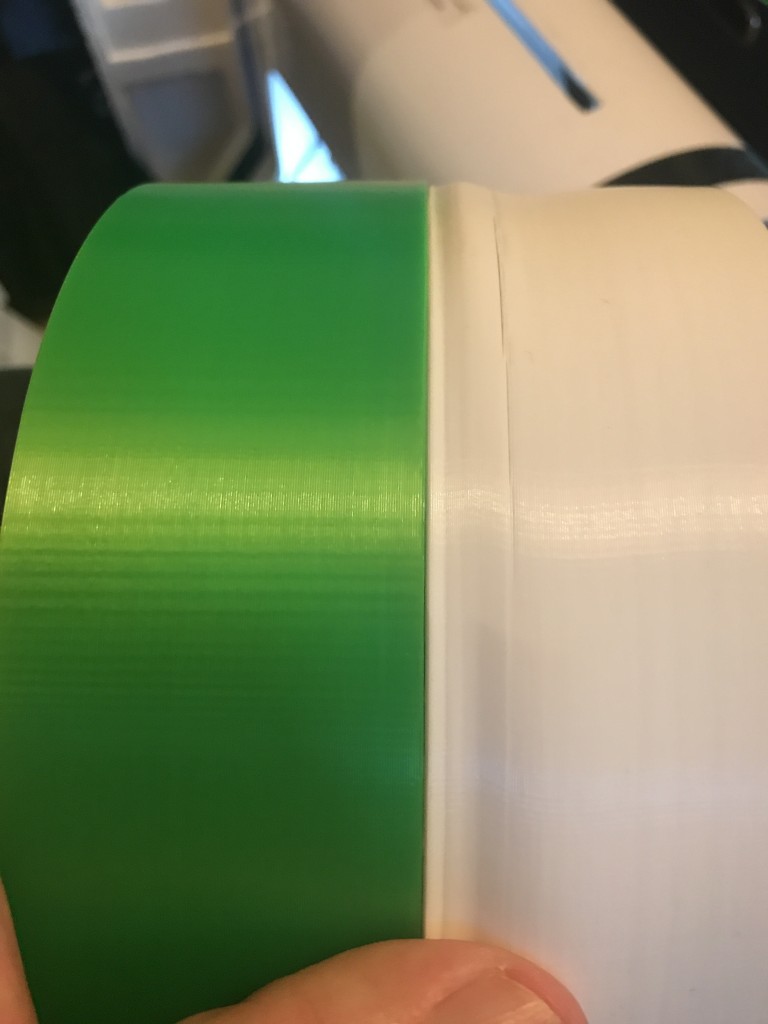
Automatic fan speed control in green, manual control in white
Printing with PETG
For the most part, I’ve been a PLA guy. My goal was never to make 3D printing a hobby but to use it as a tool when making rockets. I’ve always had the intention of using ABS for a lot of reasons, but primarily due to the ventilation requirements I have only dabbled up to this point.
I can’t remember why I’d bought the PETG spool. It’s sat unopened for quite a while. From a rocketry point of view, it doesn’t like to be glued or painted so it’s not much use for a lot of what I wanted to do. At this point, I’ve been struggling with the Robo 3D for quite a while and it’s time to consider making my own. PETG is a good candidate for making the printed parts I need.
The first time I tried, I noticed that my old heater was worn out and tired. The project went on the back burner until I got that replaced. When that was done, I started on my Saturn V so that got placed on hold. Well, when I needed to print some test pieces for fit and size, my PLA was running low so it seemed like a good time to roll out my unused PETG.
My first impressions are good. PETG has a reputation for sticking so I put painters tape on my glass bed so there would be no damage. And stick it did. The downside is that I only have narrow tape, so the surface is uneven as it overlaps between strips. The large test pieces I printed came out great!
My next print was a reusable spool for filament purchased without the spools. Also great! I love the feel. The surface is smooth and it feels more like plastic than the rigid PLA prints do. Next was a spool holder for nylon (I’m getting adventurous now!) again with great results.
But back to PLA to print some pieces. And boy do they look like crap. I was blaming my printer with its known hardware issues. Then I looked at the PLA prints I’d just completed without the same issues and started to rethink things. Maybe it was the filament. You know the filament I’d bout 2 years previously that had spent half that time in storage and the other half idle on the spool holder. I printed the same part in PETG and I’m not blaming the printer anymore. It really is a shame you can’t glue or paint it!
As I write this my first spool of PETG is winding down, and I got a replacement supply of PLA today so it’s back to printing rocket parts. But PETG will have its place as well. If it can be screwed or fastened in other ways, like EBay sleds, and 3D printer parts, from here on out it will be PETG.
I still need to try the nylon, and I’m sure it will have its place, and ABS is definitely something I need to get back into. I’m now a multi-filament printer!
Macro for creating nose cones in FreeCAD
On twitter I noticed someone struggling with OpenSCAD to create nose cone shapes when it occurred to me that I had a macro. I’d originally developed mine in OpenSCAD but quickly moved to FreeCAD and finalized development there. Sadly I have no idea what became of my OpenSCAD original.
It does have some FreeCAD specific stuff, but it’s written in Python so should be usable in other contexts. So it’s time to share.
You can download here
The Blob!
So I’d started a multi-hour print. I double checked that the start layers were properly adhered to the build plate, and walked away. Returning a few hours later I found… The BLOB!
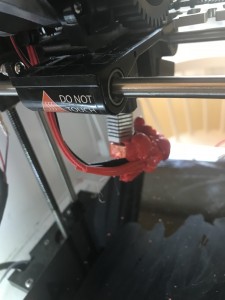

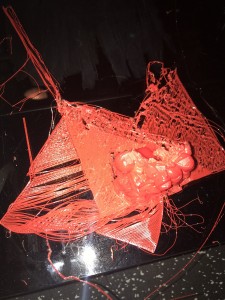
Yup. I had a big chunk of plastic wrapped around my print head. Even worse, it had worked its way into my cooling fan.
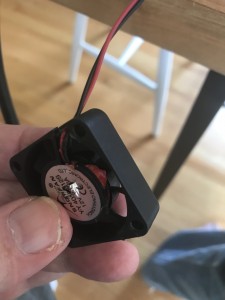
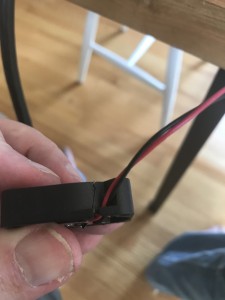
You can see the red plastic in the brushes if you look closely. In addition, prying the palstic off of the printer caused the fan case to crack. So time for a new fan. Le sigh.
Luckily, the part around the print head itself came off easily after heating it up to temperature for a while. It needed a proper cleaning though.
Welcome to my 3D Printing blog
I’ve had my 3D printer for a while, with high hopes of integrating it in to my rocket building program with mix results. It’s been such a mixed bag of incredible success and absolute frustration. The path has not been smooth.
Part of this is that 3D printing has a higher learning curve than you might realize, so it needs to be your primary focus until you have it figured out. That isn’t what I intended. This was meant to be an enabling technology that allowed me to explore other creative possibilities. It was just a tool. That was a mistake.
Some is poor documentation. I was having bad prints for a long time because my print head wasn’t properly calibrated. This was never mentioned in the beginner guides, or in the documentation. It is well covered in the forums, but for a consumer technology, that’s not where it belongs. It took me far longer to figure out what the problem was than it did to fix it. A simple troubleshooting guide would have cut that time considerably. They exist online, and are easy to find once you know what you’re looking for, but that doesn’t help the beginner.
Some is bad luck. I had my heater in the printer heater bed fail. Replacing this was easy for me as someone with both hardware and software experience, and I upgraded it in the process. You could get a direct replacement from the manufacturer, but what I have now is more robust and capable. Heaters fail… but not often. Lucky me.
I also had a print detach from the print surface. Again, this happens. By the time I noticed, my print head and fan were encased in plastic. Le sigh. Again, bad luck.
So this is my 3D printer. It’s a Robo3D R1+. Despite my issues, it’s a decent 3D printer. Any printer I would have bought at that time at a similar price point had the potential for similar issues. Bear that in mind.
